
Serilog and .NET 8.0 minimal APIs
ASP.NET Core keeps evolving, and it’s been a while since I wrote one of these, so read on below for my take on an optimal Serilog configuration for ASP.NET Core 8 and the “minimal API” application model, a.k.a. WebApplicationBuilder.
I’ve arranged this into three parts: configuring Serilog, hooking up Microsoft.Extensions.Logging.ILogger<T>, and recording web requests. Each part builds on the one before it.
Configuring Serilog
First, it’s important to realize that ASP.NET Core apps are “just” regular console apps. You can set up Serilog and use it without anything ASP.NET Core-specific at all. Doing this first helps to validate that you have the foundations working, before moving onto anything more involved.
Assuming you have a blank “minimal API” project (dotnet new web), your Program.cs file will look like this:
var builder = WebApplication.CreateBuilder(args);
var app = builder.Build();

app.MapGet("/", () => "Hello World!");

app.Run();
Install Serilog and its console sink from NuGet:
dotnet add package Serilog
dotnet add package Serilog.Sinks.Console
At the top of Program.cs, create a logging pipeline and assign it to the static Log.Logger property:
using Serilog;
Log.Logger = new LoggerConfiguration()
.WriteTo.Console()
.CreateLogger();
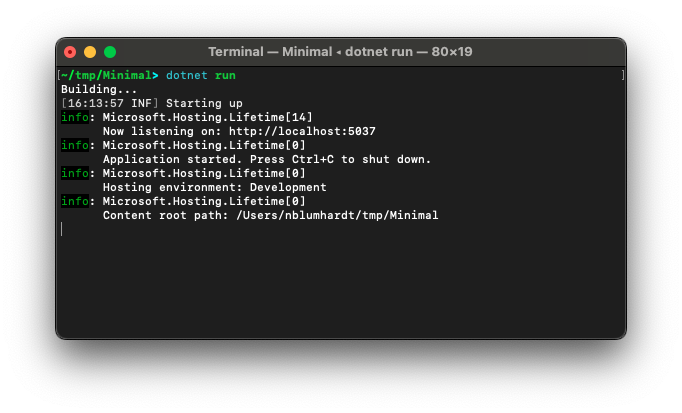
Log.Information("Starting up");
var builder = WebApplication.CreateBuilder(args);
var app = builder.Build();
app.MapGet("/", () => "Hello World!");
app.Run();
Running your program should now produce the “starting up” message from Serilog, then some default output from the framework.
There’s one more thing to do. If the application fails to start, we want to capture any thrown exceptions, and also make sure any buffered log events are flushed before the process exits. Adding some try/catch/finally blocks will sort this out:
using Serilog;

Log.Logger = new LoggerConfiguration()
    .WriteTo.Console()
    .CreateLogger();

Log.Information("Starting up");

try
{
    var builder = WebApplication.CreateBuilder(args);
    var app = builder.Build();

    app.MapGet("/", () => "Hello World!");

    app.Run();
    return 0;
}
catch (Exception ex)
{
    Log.Fatal(ex, "Unhandled exception");
    return 1;
}
finally
{
    await Log.CloseAndFlushAsync();
}
At this point, you can use Serilog’s Log class to write your own structured log events. In the next section, we’ll route the framework’s logging through the same pipeline.
You might be tempted to add some more sinks now. Hold on for just a moment, there are some decisions to make, which we’ll discuss in the next section.
Hooking up ASP.NET Core and ILogger<T>
This turns out to be ultra-simple. Install Serilog.Extensions.Hosting:
dotnet add package Serilog.Extensions.Hosting
And call builder.Services.AddSerilog():
try
{
    var builder = WebApplication.CreateBuilder(args);
    builder.Services.AddSerilog(); // <-- add this
    var app = builder.Build();
    // ...
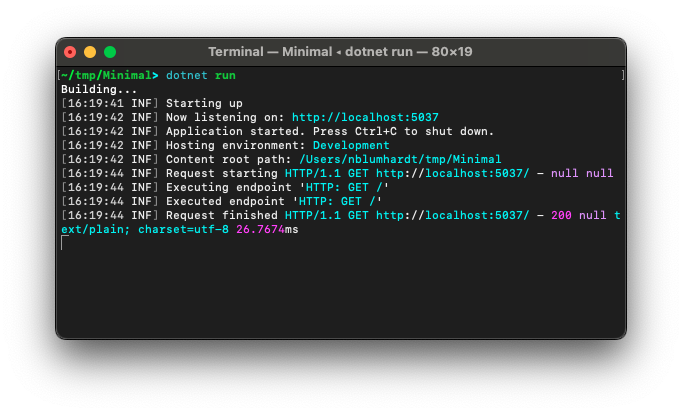
Now, running the application will produce markedly different, and I think much nicer, results:
This is the time to start thinking about where else you would like to send your logs. Chances are, if you want to record events somewhere other than STDOUT, you’ll need to configure a destination - perhaps setting a log file path, or log server URL.
I’ll go out on a limb here, and suggest avoiding appsettings.json. I don’t expect you’ll all agree with me, so we’ll examine two different approaches, and you can make up your mind what works best for your application.
I’ll use the Seq sink as an example, since I built the first versions of Seq, and it’s now what I work on day-to-day. The process is very similar for any other typical Serilog sink; if you have trouble with the one you choose, let me know in the comments 🙂.
dotnet add package Serilog.Sinks.Seq
Once you’ve installed your sink package, you’ll need to add that sink to the logging pipeline.
Option 1 is to add your sink in code, and configure it there. You can make up environment variable names for any settings that you need to modify at deployment time:
Log.Logger = new LoggerConfiguration()
    .WriteTo.Console()
    .WriteTo.Seq( // <-- add these lines
        Environment.GetEnvironmentVariable("SEQ_URL") ?? "http://localhost:5341",
        apiKey: Environment.GetEnvironmentVariable("SEQ_API_KEY"))
    .CreateLogger();
To get a Seq container running on http://localhost:5341, use:
docker run --rm -it -e ACCEPT_EULA=y -p 5341:80 datalust/seq
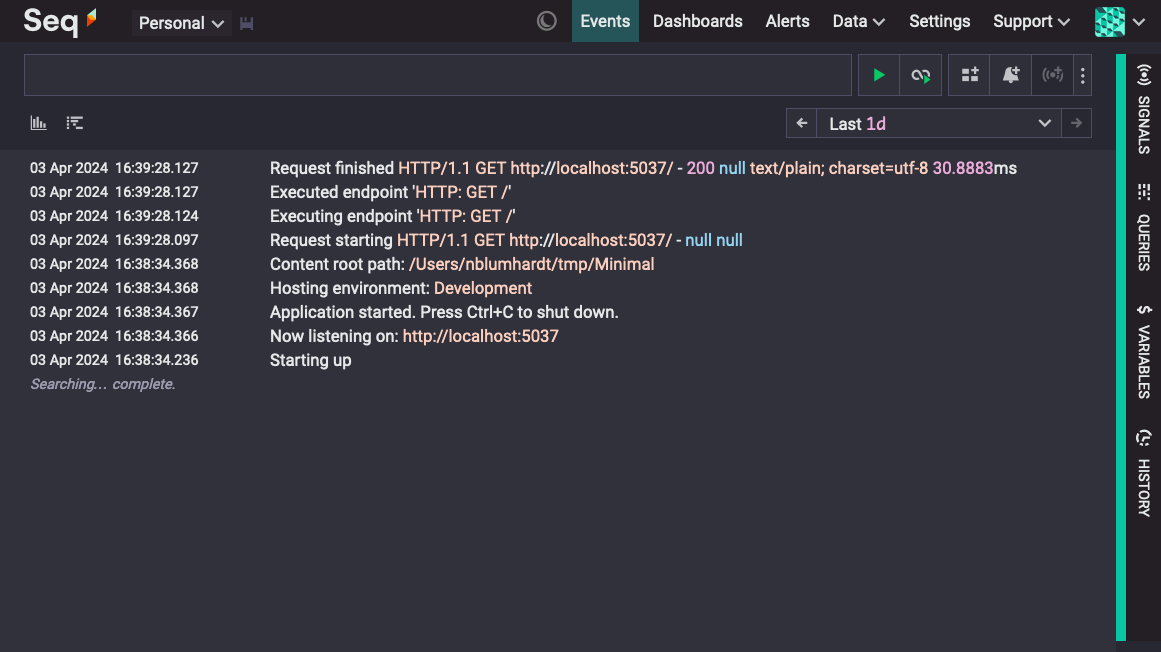
Run the app, open http://localhost:5341 in a web browser, and you’ll see something resembling:
I like this approach to configuration because it’s obvious, the compiler checks that I’ve provided all of the required parameters, and anything that’s not modified at deployment time can be specified in strongly-typed C#. It also works reliably alongside single-file publishing.
Option 2 is to use Serilog.Settings.Configuration to load your sinks from appsettings.json. Skip this section if you’re happy configuring everything in code as above.
dotnet add package Serilog.Settings.Configuration
Configuration isn’t immediately available, which means giving up on capturing exceptions that occur early in start-up, unless you want to jump through some additional hoops. My advice is to keep things simple, stripping back your Program.cs to something like:
using Serilog;

var builder = WebApplication.CreateBuilder(args);

builder.Services.AddSerilog(lc => lc
    .WriteTo.Console()
    .ReadFrom.Configuration(builder.Configuration));

await using var app = builder.Build();

app.MapGet("/", () => "Hello World!");

app.Run();
Your appsettings.json file should look like this, with the "Seq" section replaced by your sink(s) of choice:
{
  "Serilog": {
    "Using": ["Serilog.Sinks.Seq"],
    "WriteTo": [
      {
        "Name":  "Seq",
        "Args": {
          "serverUrl": "http://localhost:5341",
          "apiKey": "<API key here>"
        }
      }
    ]
  },
  "AllowedHosts": "*"
}
The "Args" names above are the parameter names of the WriteTo.Seq() method: Serilog’s configuration system is just a JSON-driven way of calling the same configuration methods we see in the C# version. Check out the Serilog.Extensions.Configuration project README for more information on the configuration syntax.
Running the application will produce similar output to what we saw the first time. If the app fails to start, you’ll get an exception message and stack trace dumped to STDERR by the framework itself.
JSON configuration can take a little more work to get right, is a bit more fragile, and needs a little more testing. It can still be very enjoyable to use if you have a scenario that requires it. The choice is in in your hands, but the remaining examples will be built on the configuration-as-code version.
Recording web requests
At this point, the application writes a handful of log events each time a web request is handled. These contain useful data, but they’re rather noisy, and the information we typically need about a web request is spread across multiple events. In this section, we look at how to collapse this information into a single, nicely-formatted event.
The classic way to do this is to install Serilog.AspNetCore, and add app.UseSerilogRequestLogging() to your web application’s startup code, right after builder.Build(). This is super simple and effective, but ASP.NET Core is moving in a different direction. If you’re setting things up from scratch, you’ll have a better experience in the long run by relying on ASP.NET Core’s built-in Activity support to record web requests.
If you’re not familiar with System.Diagnostics.Activity, for the purposes of this post it’s enough to know that an activity represents an operation with a beginning and an end. ASP.NET Core wraps an activity around each web request it handles. Because the activity is completed after all middleware runs, the activity carries a more accurate picture of the request’s duration and final status code than the UseSerilogRequestLogging() middleware can provide. As a bonus, activities participate in distributed tracing, so you can view requests in and out of your app in a hierarchy if your chosen sink supports it.
Step one is to install SerilogTracing, its console output formatting support, and ASP.NET Core integration:
dotnet add package SerilogTracing
dotnet add package SerilogTracing.Expressions
dotnet add package SerilogTracing.Instrumentation.AspNetCore
In Program.cs, add the trace-aware formatter to the console sink, and reduce the verbosity of some Microsoft.AspNetCore.* log sources:
Log.Logger = new LoggerConfiguration()
    .MinimumLevel.Override("Microsoft.AspNetCore.Hosting", LogEventLevel.Warning)
    .MinimumLevel.Override("Microsoft.AspNetCore.Routing", LogEventLevel.Warning)
    .Enrich.WithProperty("Application", "Example")
    .WriteTo.Console(Formatters.CreateConsoleTextFormatter(theme: TemplateTheme.Code))
    .WriteTo.Seq(
        Environment.GetEnvironmentVariable("SEQ_URL") ?? "http://localhost:5341",
        apiKey: Environment.GetEnvironmentVariable("SEQ_API_KEY"))
    .CreateLogger();
I’ve used Enrich to add the Application property to all events, since this helps with tracking traced operations between systems. This is a purely optional addition, though.
And then, configure the listener that will write ASP.NET Core’s activities to the Serilog pipeline:
using var listener = new ActivityListenerConfiguration()
    .Instrument.AspNetCoreRequests()
    .TraceToSharedLogger();
Here’s the final, complete example:
using Serilog;
using Serilog.Events;
using SerilogTracing;
using SerilogTracing.Expressions;

Log.Logger = new LoggerConfiguration()
    .MinimumLevel.Override("Microsoft.AspNetCore.Hosting", LogEventLevel.Warning)
    .MinimumLevel.Override("Microsoft.AspNetCore.Routing", LogEventLevel.Warning)
    .Enrich.WithProperty("Application", "Example")
    .WriteTo.Console(Formatters.CreateConsoleTextFormatter(theme: TemplateTheme.Code))
    .WriteTo.Seq(
        Environment.GetEnvironmentVariable("SEQ_URL") ?? "http://localhost:5341",
        apiKey: Environment.GetEnvironmentVariable("SEQ_API_KEY"))
    .CreateLogger();

using var listener = new ActivityListenerConfiguration()
    .Instrument.AspNetCoreRequests()
    .TraceToSharedLogger();

Log.Information("Starting up");

try
{
    var builder = WebApplication.CreateBuilder(args);
    builder.Services.AddSerilog();
    var app = builder.Build();

    app.MapGet("/", () => "Hello World!");

    await app.RunAsync();
    return 0;
}
catch (Exception ex)
{
    Log.Fatal(ex, "Unhandled exception");
    return 1;
}
finally
{
    await Log.CloseAndFlushAsync();
}
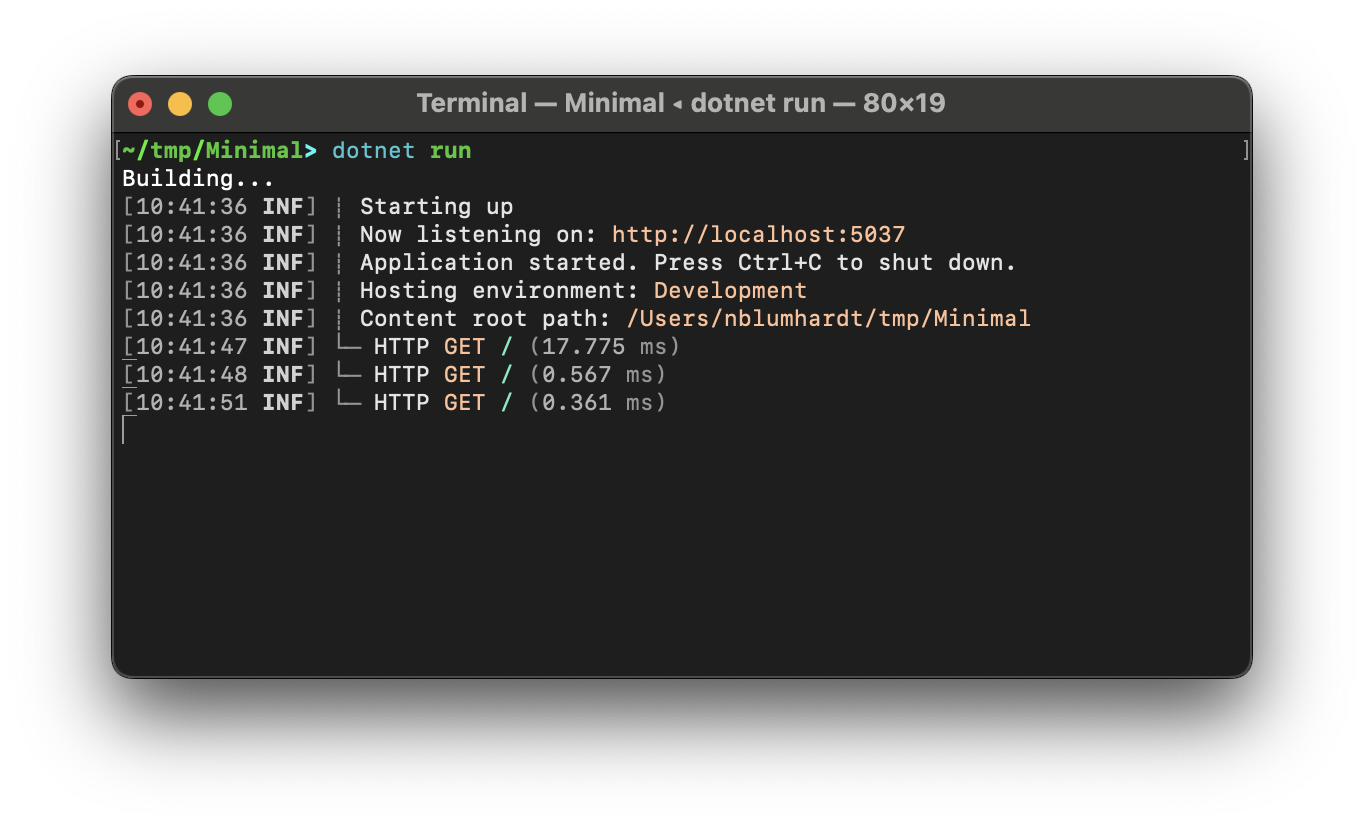
And the output at the terminal:
If you’re following along using Seq, you’ll see the same events there:
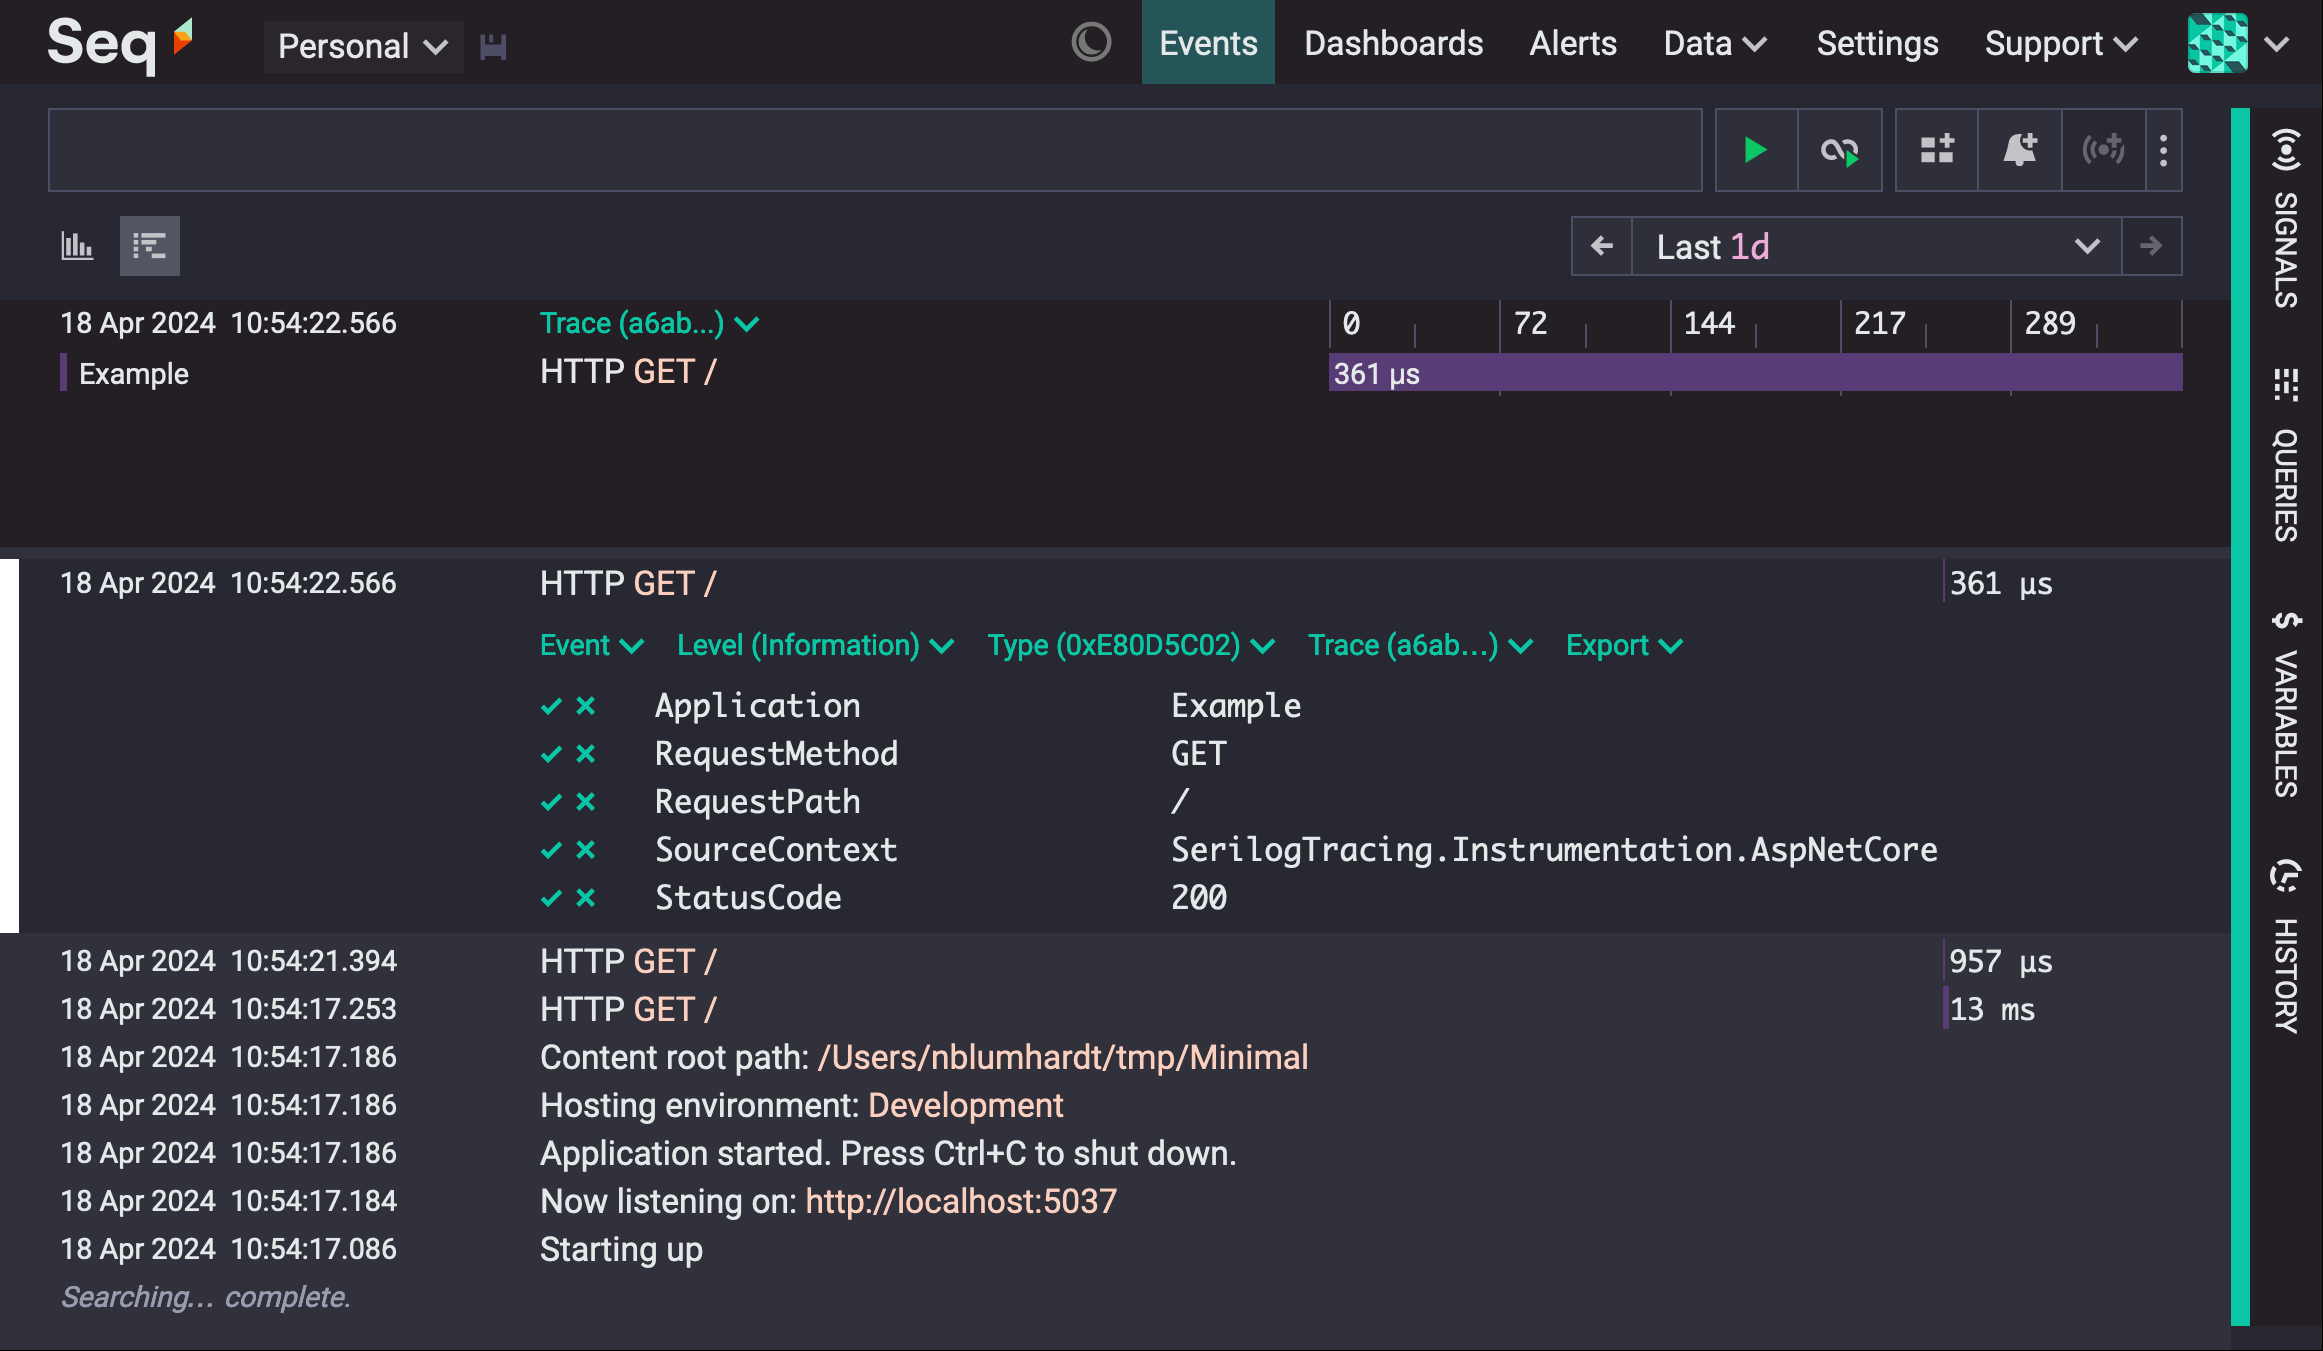
SerilogTracing works with all Serilog sinks, but at the time of writing, the Seq sink, SerilogTracing.Sinks.OpenTelemetry, and SerilogTracing.Sinks.Zipkin have been written or modified to support back-ends with hiearchical tracing features. In other sinks, spans will show up as regular log events.
Tip: if you’re using a sink without hierarchical tracing support, add
Enrich.WithSpanTimingMilliseconds()to add a convenientElapsedproperty to request completion events.
Where to next?
So this is how I’d do it; you might find a different approach that works for you! Let me know how you go, or say “hi”, on TwitterX and Mastodon.
The serilog tag on StackOverflow is the place for help with Serilog and how it integrates with other tech.
Thanks for stopping by! 👋