
Packaging a self-contained .NET Core app for Windows Installer
Serilog 2.0 introduced a handy new JSON serialization format for application logs. In the next version of Seq, we’re using it for Seq’s own internal diagnostic log file instead of (somewhat ironically) plain text, so that we can more easily sift through events and spot issues with Seq itself.
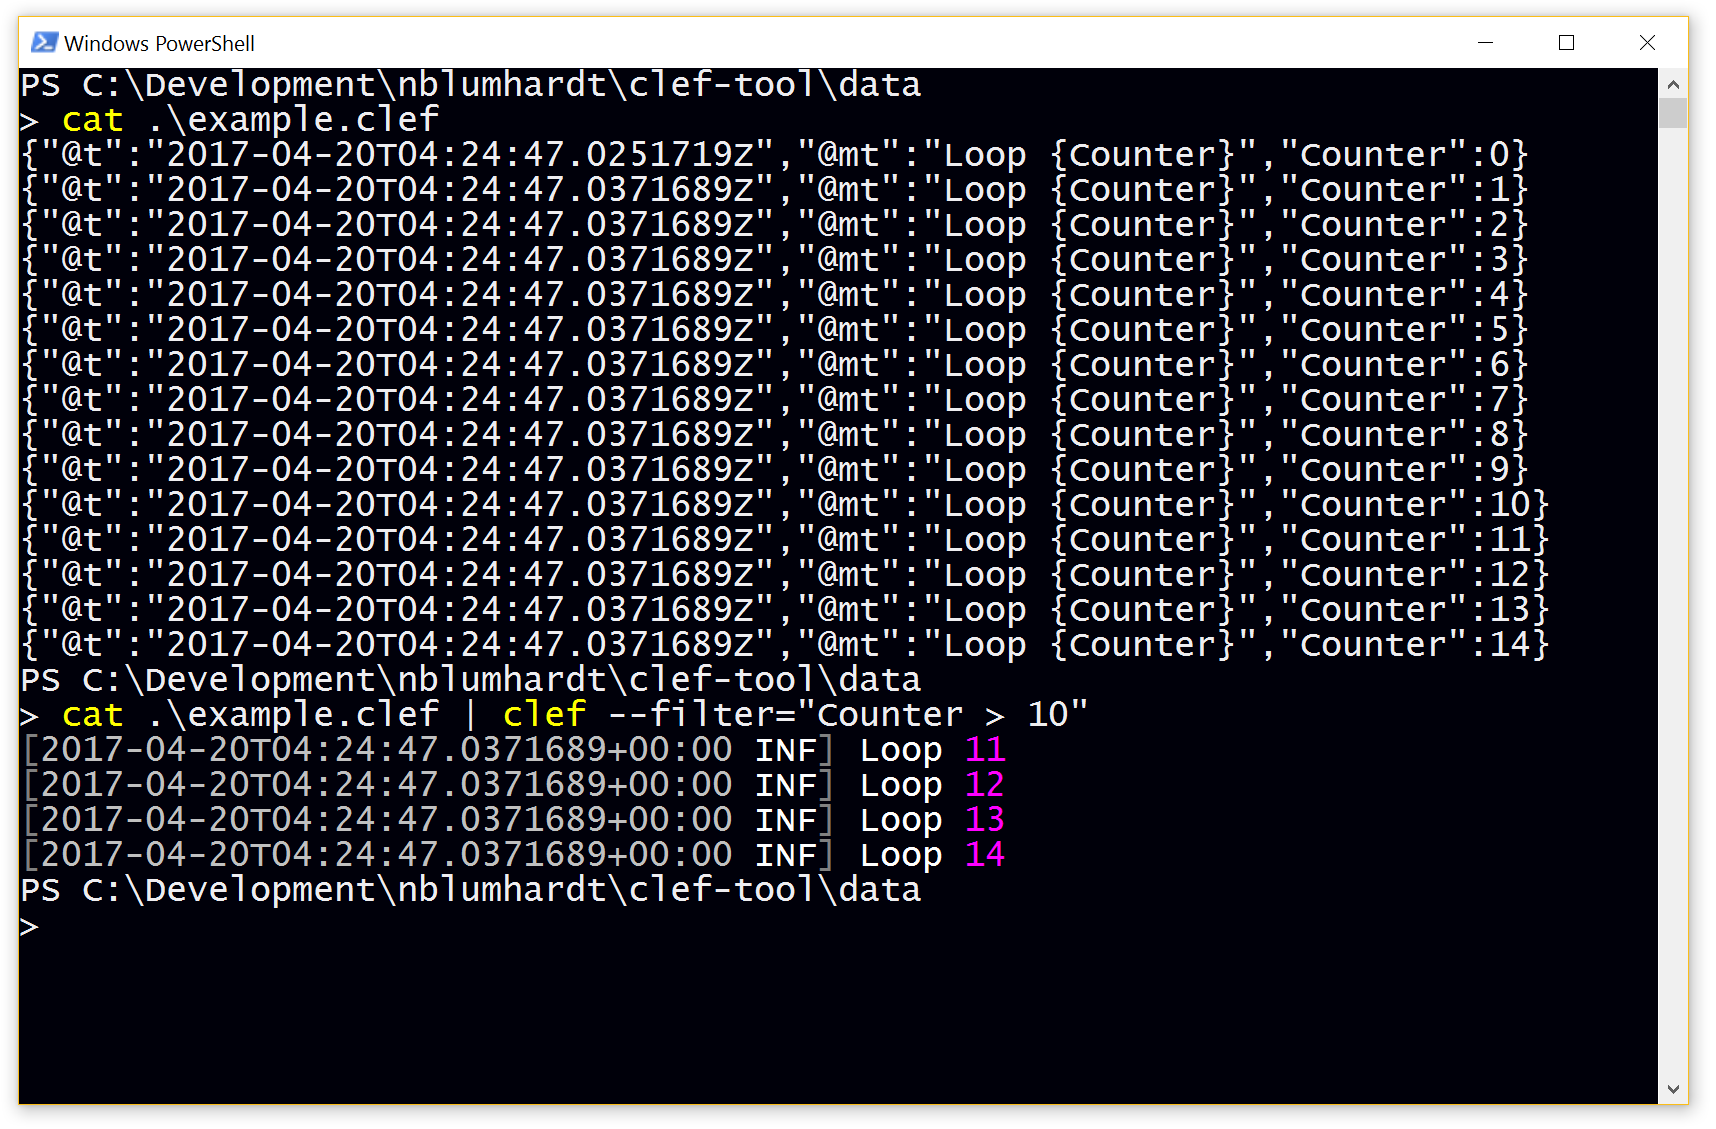
Like XML before it, JSON is arguably human-readable, but not really comfortable to work with in large volumes. So, last week, I cobbled together CLEF Tool, a tiny command-line program you can use for filtering, enriching, forwarding, and pretty-printing Serilog’s compact JSON format:
You can download a Windows MSI package that will install clef.exe and put it on your PATH from the Releases page in the GitHub repository.
Oh, and happily, you don’t need a particular version of the .NET Framework installed to run this app: it’s fully self-contained, carrying everything it needs in the 20 MB MSI package.
This is the first time I’ve tried packaging a .NET Core app for the Windows Installer, so I thought I’d write these brief notes to help anyone else interested in taking the same path.
File > New project
First, the project needs to be a .NET Core executable. The template in Visual Studio is called Console App (.NET Core).
Since this package is only targeting 64-bit Windows at the moment, all I’ve done to the project file itself is to add a RuntimeIdentifiers element with win10-x64 as the target runtime.
<Project Sdk="Microsoft.NET.Sdk">

  <PropertyGroup>
    <OutputType>Exe</OutputType>
    <TargetFramework>netcoreapp1.1</TargetFramework>
    <RuntimeIdentifiers>win10-x64</RuntimeIdentifiers>
Building the project should now produce some files in bin/$(Configuration)/netcoreapp1.1/win10-x64 - but these aren’t quite what we need for the installer.
WiX
The WiX Toolset is an MSBuild-based kit for building Windows Installer packages. You’ll need to install WiX itself, from the website, and also install the Visual Studio extension from the gallery.
With a WIX project file added to your solution (WiX Toolset > v3 in my case > Setup project in Visual Studio), you’ll have a .wixproj project file to build, and a .wxs file that configures the installer itself.
WiX is wonderful, but configuring it is quite an undertaking. For our purposes here, the important hackinnovation is in the .wixproj file’s BeforeBuild target. Obviously, you’ll need to modify the paths to suit your own project names and structure.
<Target Name="BeforeBuild">
  <Exec Command="dotnet publish ..\..\src\Datalust.ClefTool\Datalust.ClefTool.csproj -c $(Configuration) -r win10-x64" />
  <PropertyGroup>
    <LinkerBaseInputPaths>..\..\src\Datalust.ClefTool\bin\$(Configuration)\netcoreapp1.1\win10-x64\publish</LinkerBaseInputPaths>
    <DefineConstants>BasePath=..\..\src\Datalust.ClefTool\bin\$(Configuration)\netcoreapp1.1\win10-x64\publish</DefineConstants>
  </PropertyGroup>
  <HeatDirectory OutputFile="ClefTool.wxs" DirectoryRefId="INSTALLFOLDER" ComponentGroupName="ClefTool_Project" SuppressCom="true"
    Directory="..\..\src\Datalust.ClefTool\bin\$(Configuration)\netcoreapp1.1\win10-x64\publish"
    SuppressFragments="true" SuppressRegistry="true" SuppressRootDirectory="true" AutoGenerateGuids="false" GenerateGuidsNow="true"
    ToolPath="$(WixToolPath)" PreprocessorVariable="var.BasePath" Transforms="RemovePdbs.xslt" />
</Target>
What’s going on here? This target will be run by MSBuild before WiX generates the installer package. Let’s break it down by line.
<Exec Command="dotnet publish ..\..\src\Datalust.ClefTool\Datalust.ClefTool.csproj -c $(Configuration) -r win10-x64" />
First, we’re calling out to dotnet publish to generate the self-contained layout for the win10-x64 runtime target. This will create a publish folder nested under the output folder we looked at earlier.
  <PropertyGroup>
    <LinkerBaseInputPaths>..\..\src\Datalust.ClefTool\bin\$(Configuration)\netcoreapp1.1\win10-x64\publish</LinkerBaseInputPaths>
    <DefineConstants>BasePath=..\..\src\Datalust.ClefTool\bin\$(Configuration)\netcoreapp1.1\win10-x64\publish</DefineConstants>
  </PropertyGroup>
The properties here make it possible for WiX to find the outputs from dotnet publish.
  <HeatDirectory OutputFile="ClefTool.wxs" DirectoryRefId="INSTALLFOLDER" ComponentGroupName="ClefTool_Project" SuppressCom="true"
    Directory="..\..\src\Datalust.ClefTool\bin\$(Configuration)\netcoreapp1.1\win10-x64\publish"
    SuppressFragments="true" SuppressRegistry="true" SuppressRootDirectory="true" AutoGenerateGuids="false" GenerateGuidsNow="true"
    ToolPath="$(WixToolPath)" PreprocessorVariable="var.BasePath" Transforms="RemovePdbs.xslt" />
Heat is the part of the WiX Toolset that scans a directory and produces a .wxs file that contains WiX XML instructions for including those files in the installer package. Here, the generated file is ClefTool.wxs.
Note two important steps here:
- Add the generated file to your WiX project in Visual Studio or it won’t be found at build time; and,
- In your
Product.wxsfile, add aComponentGroupRefelement to theProductFeatureelement, like the one below, using theComponentGroupNamefrom the Heat command.
<Feature Id="ProductFeature" Title="CLEF Tool" Level="1">
  <ComponentGroupRef Id="ClefTool_Project" />
Unless I’ve missed something vital - which is entirely possible - building your setup project will create an MSI that installs everything generated by dotnet publish.
Building and packaging
Building is fairly straightforward. The build script included in the repository uses some PowerShell to update the version in the WiX project file, and then builds the solution using msbuild. It’s a little tedious, but unsurprising, so I’ll leave you with the script itself.
Also included in the repository, you’ll find an appveyor.yml file publishes releases to GitHub using the wonderful AppVeyor service.
Important caveats
I’m sure there are many details I’ve omitted from this overview - if in doubt, you’ll need to check the code. The project was written to scratch an itch, not to demonstrate an optimal way of doing things. If you spot issues, or find better ways of doing things, please let me know!
Also, please, please please please please please, if you decide to make an installer based on this example, use your own GUID UpgradeCode, icons, banner bitmaps, and other identifying attributes from Product.wxs :-).
The repository is published as datalust/clef-tool on GitHub.